

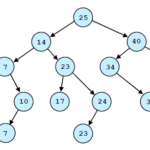
La-g121p Schematic Info
The Super I/O chip acts as the "brain" for the laptop's basic functions before the main processor boots up. The schematic maps out how this chip handles: Power button signal recognition ( PWRBTN# ) Lid switch status ( LID_SW# ) Keyboard matrix routing Thermal fan speed control (PWM lines) 4. System Signal Paths (SMBus / I2C / SPI)
If you have no +3.3V_ALW , the laptop will never turn on. The schematic shows that AC_IN (BQ24780S pin 5) must go high to ACDET (2.4V). If ACDET is wrong, check resistors PR36 and PR37.
What does the laptop exhibit (e.g., completely dead, blinking LED codes, fan spins briefly)?
Check the voltage on the current-sensing resistor directly after the entry MOSFETs. la-g121p schematic
(often referred to as Compal EPG52 LA-G121P ) is a motherboard schematic specifically used for repairing the laptop series
Compal LA-G121P is a notebook motherboard commonly found in the series (specifically the HP 15-bs289wm) and related models. Key Specifications & Architecture Manufacturer: Platform Name: Standard Revision: Processor Support:
: Troubleshooting advice and requests for specific versions are frequently posted in community groups like Facebook Repair Groups . Technical Specifications (Mockingbird-L Platform) Processor Intel 10th Gen Comet Lake-U (e.g., i5-10210U) Memory DDR4 support Graphics UMA (Integrated) or Discrete (NVIDIA N17S with GDDR5) Form Factor 14-inch (3410) and 15-inch (3510) laptops Project Code Wistron Mockingbird-L CML Common Repair Use Cases The Super I/O chip acts as the "brain"
Need help interpreting a specific signal from your LA-G121P schematic? Consult professional repair forums with the page number and circuit name for targeted advice.
To help give you the most accurate advice or troubleshooting steps, could you tell me:
If you have the schematic open, pull up the "Power Up Sequence" table (usually page 5 or 6). For the AMD LA-G121P, the sequence is: The schematic shows that AC_IN (BQ24780S pin 5)
The LA-G121P is a multi-layer motherboard. Traces are often buried inside the board. The schematic is a logical map; physical access to test points may require component removal or micro-probing. Always unplug the battery and discharge capacitors before measuring resistance to avoid false readings or damage.
If a USB port or the keyboard backlight circuit shorts, it often kills the 3V/5V standby chip, causing the main 19V rail to drop or pulse.